# Install and Manage OpenVPN with OpenVPN Access Server
OpenVPN Access Server is provide with its own TLS web server, so Comonway cannot define strict rules.

# What is OpenVPN?
OpenVPN is a popular software package which creates encrypted tunnels for secure data transfer. In this guide, you will learn to configure your Linode as a VPN gateway using the OpenVPN Access Server software, and connect your Windows, macOS, or Linux computer to it.
OpenVPN Access Server requires a paid license to use more than two connected devices.
# Requirements
- Ensure that you have not already installed OpenVPN before starting this guide
- Ensure that you have root access to your Comonway or a user account with
sudoprivilege - Update your system
- Allow TCP traffic through port
9443and UDP through port1194on your firewall
# First start
The admin interface is available at https://openvpn.your-subdomain.comonway.com/admin with a default user/password and admin/password
Note: Because the Access Server comes with a self-signed SSL certificate to begin with, you will receive a warning in the browser like “Invalid certificate" or “Cannot verify identity of the server". You will have to confirm that you wish to continue to the web interface. You will then see the login screen.
During first login, make sure that the "Authentication" in the webui is set to "Local" instead of "PAM". Then set up the user accounts with their passwords (user accounts created under PAM do not survive container update or recreation).
The "admin" account is a system (PAM) account and after container update or recreation, its password reverts back to the default. It is highly recommended to block this user's access for security reasons:
Accept the End User License Agreement and you'll be taken to the Status Overview page. The page should say the server is started and currently on.
Create another user and set as an admin,
- Log in as the new user,
- Delete the "admin" user in the gui,
- Modify the
as.conffile under config/etc and replace the lineboot_pam_users.0=adminwith#boot_pam_users.0=adminboot_pam_users.0=kjhvkhv(this only has to be done once and will survive container recreation)
IMPORTANT NOTE: Commenting out the first pam user in as.conf creates issues. To make it work while still blocking pam user access, uncomment that line and change admin to a random nonexistent user as described above.
For modifying as.conf, you need to access through Portainer:
- Log in to your portainer
https://portainer.your-subdomain.comonway.com - Select openvpn container

- Press on Console

- Press on Connect
- Install Nano editor with the command
apt update && apt install nano -y - Edit the file as explain above with
nano /config/etc/as.conf - Save the file with
Ctrl+Sand QuitCtrl+X - Restart service with
service openvpnas restart

- Quit console and control that admin interface is reachable with your new admin user
# Configuration
# Network Settings
- Change Hostname to public domain as
vpn.your-subdomain.comonway.com

- Press on Save Settings at the bottom of the page, then Update Running Server
The VPN Server is now available at vpn.your-subdomain.comonway.com.
# VPN Settings
- For Edge system, set "Should client Internet traffic be routed through the VPN ?" to No.
# Advanced VPN Settings
- Set Should clients be able to communicate with each other on the VPN IP Network?
- Allow VPN users with Administrator privilege to access all VPN client IP addresses
- Allow multiple concurrent VPN connections for a user
# Usage
Clients can access each others only if they are in the same group.
Server private network cannot reach OpenVPN clients at the momemt. Comonway team can search solutions if it will be needed.
# User Management
You can add additional users to your OpenVPN Access Server to enable auditing of connections to your VPN tunnel, and user level access control.
Info
OpenVPN Access Server's free edition is limited to two users. If you require additional users for your VPN, you can view pricing details and purchase licenses at OpenVPN's Website
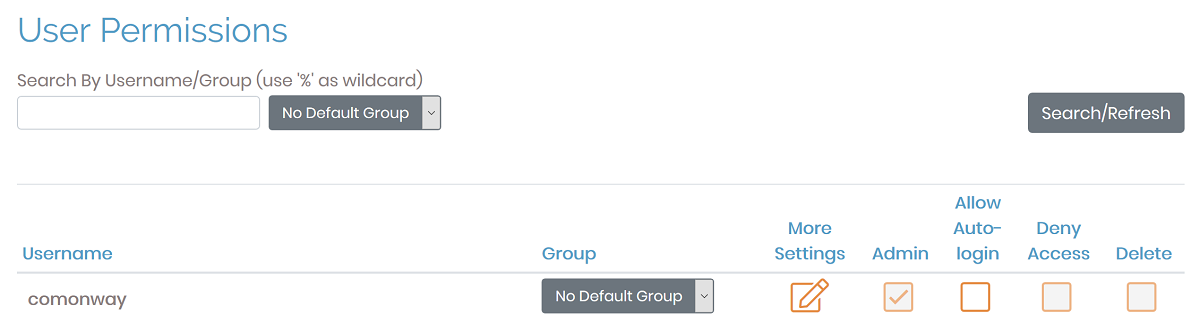
From the admin web interface, click the User Permissions link under User Management.
Enter the new username that you wish to add in the
New Usernamefield at the bottom of the list.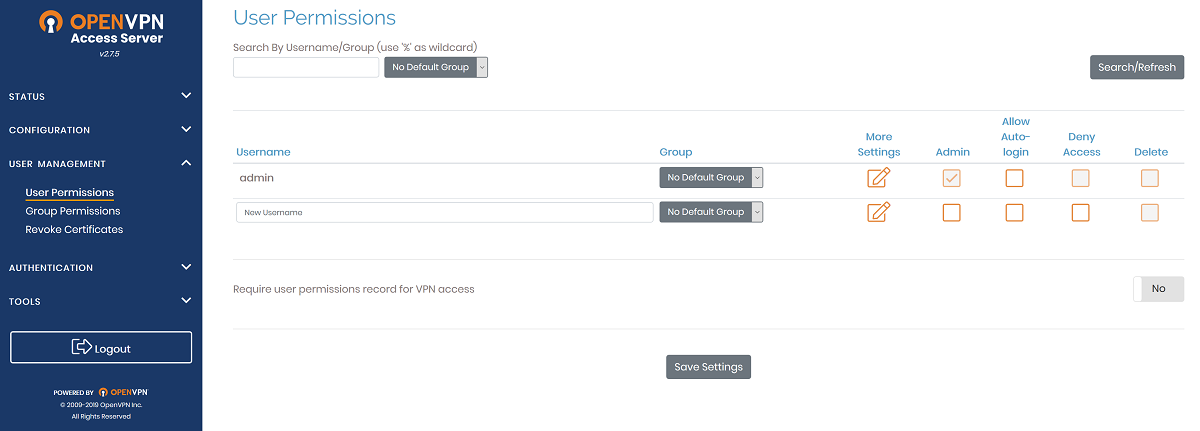
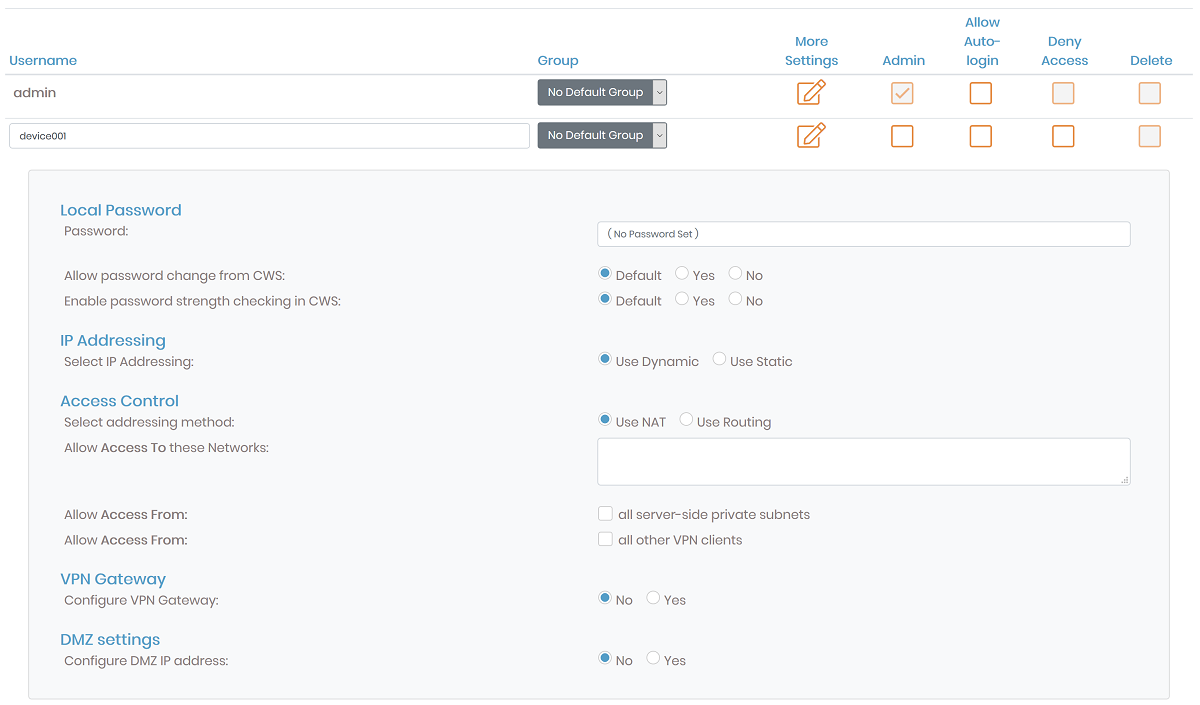
View and configure additional settings for the new user by clicking the Show link in the More Settings column.
Click the Save Settings option at the bottom of the page to complete the creation of the new user account.
# Permit Autologin Profiles
If you wish to configure autologin profiles, you will need to modify your user settings to allow autologin profiles to be displayed on the connections page.
Caution
This configuration type can be useful for connecting other servers to your VPN on startup, or for configuring a system that will always route all of its traffic over the VPN automatically. Utilizing this type of profile will cause all of your non-local traffic to be routed over the VPN automatically if you activate the option for routing client Internet traffic through the VPN. If you wish to enable and disable your VPN at will, you will want to utilize User or Server locked profiles instead.
From the OpenVPN Access Server admin web interface, visit the User Permissions link.
Select the checkbox for Allow Auto Login for the required user to enable this profile.
